.svg)

GitHub is a provider of Internet hosting for software development and version control using Git, which is widely used by application developers and tech companies. However, you can also use GitHub to host your website even if you’re not a developer.
Each GitHub account/organization can only create one GitHub Pages, but an account can create infinite organizations, which means you can effectively host unlimited websites.
In this tutorial we will be using Webflow to generate a static site (by downloading website zip file), but it should work just as well if you use other ways to generate or download a static site.
Note: Your Webflow account must at least have Account Plan Lite, and you cannot use CMS on your website. Also, you cannot use Webflow form submission if you are hosting your website with GitHub.
If you have your website ready on Webflow, here is what to do next.
Step-by-step Guide:
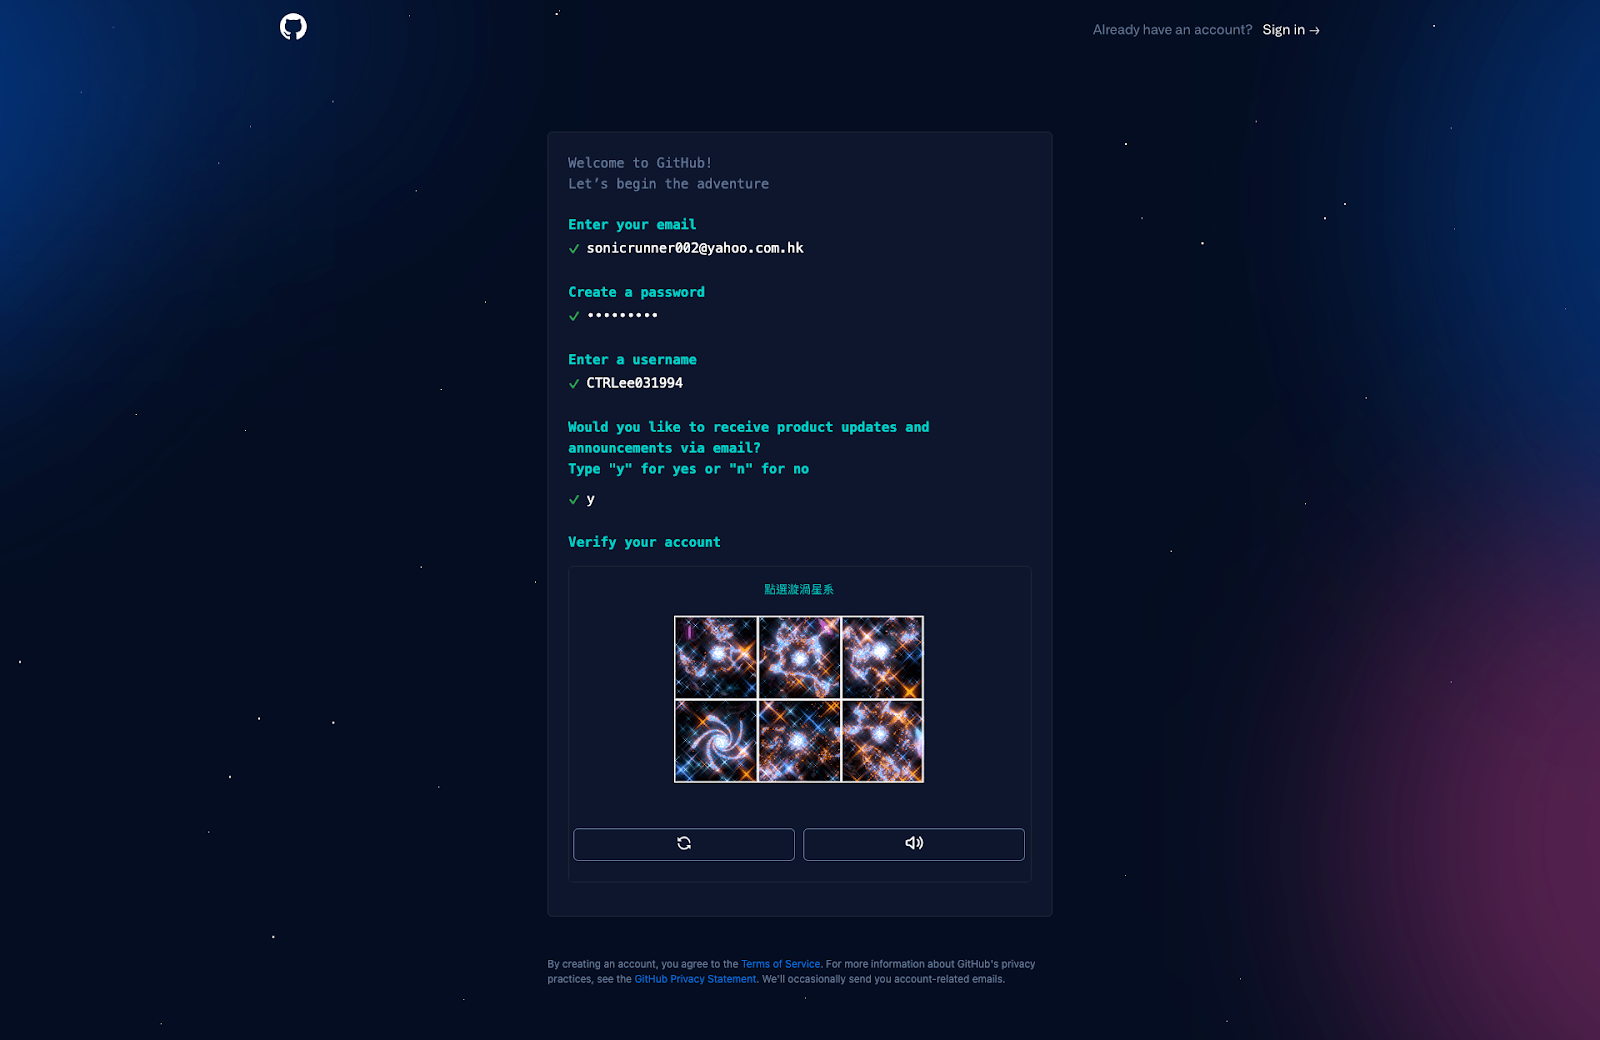
1. Create a GitHub Account
2. Create a Repository
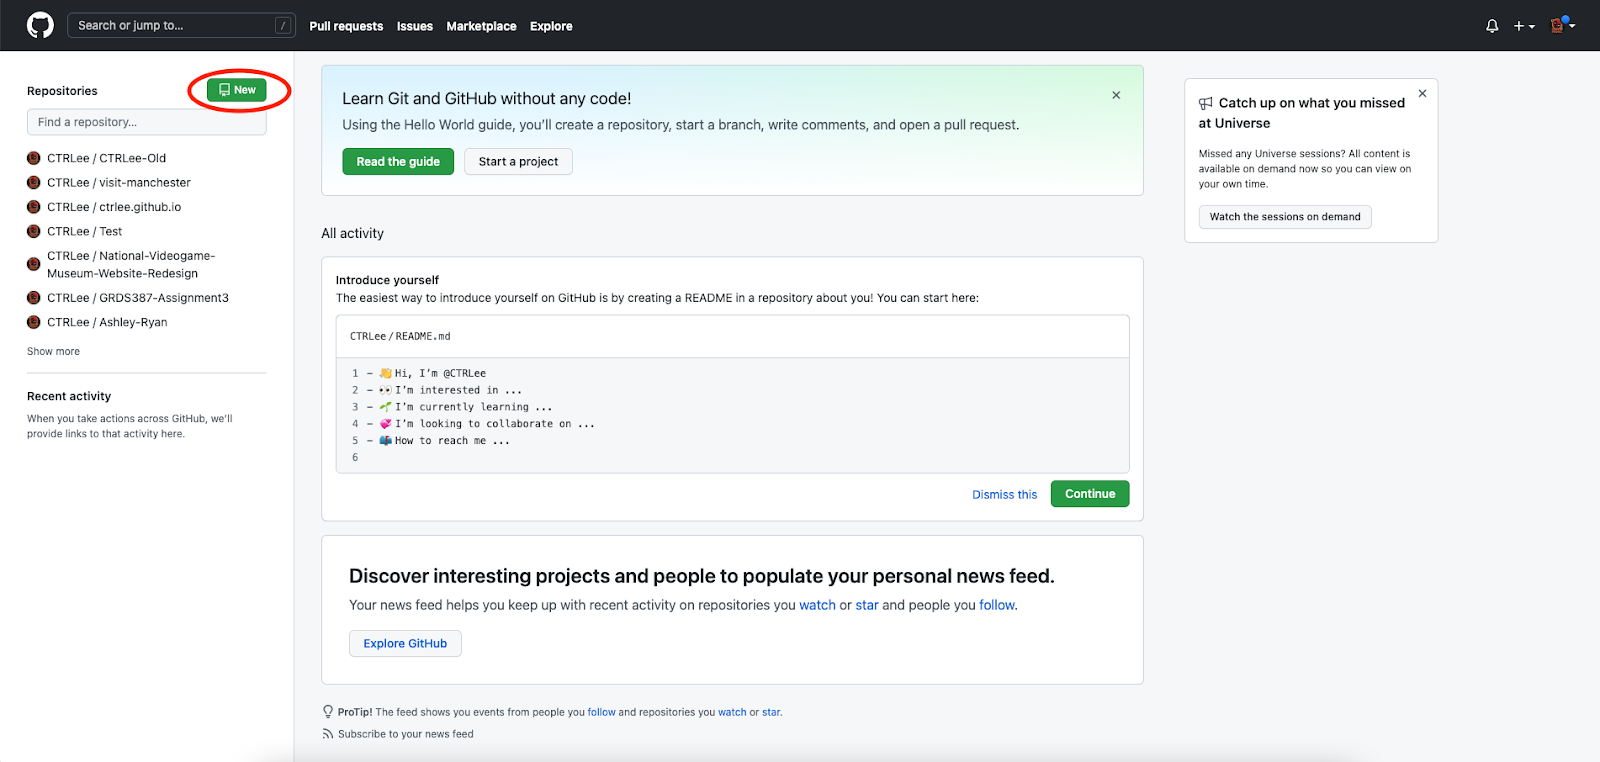
a. This is the initial interface when you first created your account. Click “New” or "Create a repository" (shown in red circle) to create a new repo.
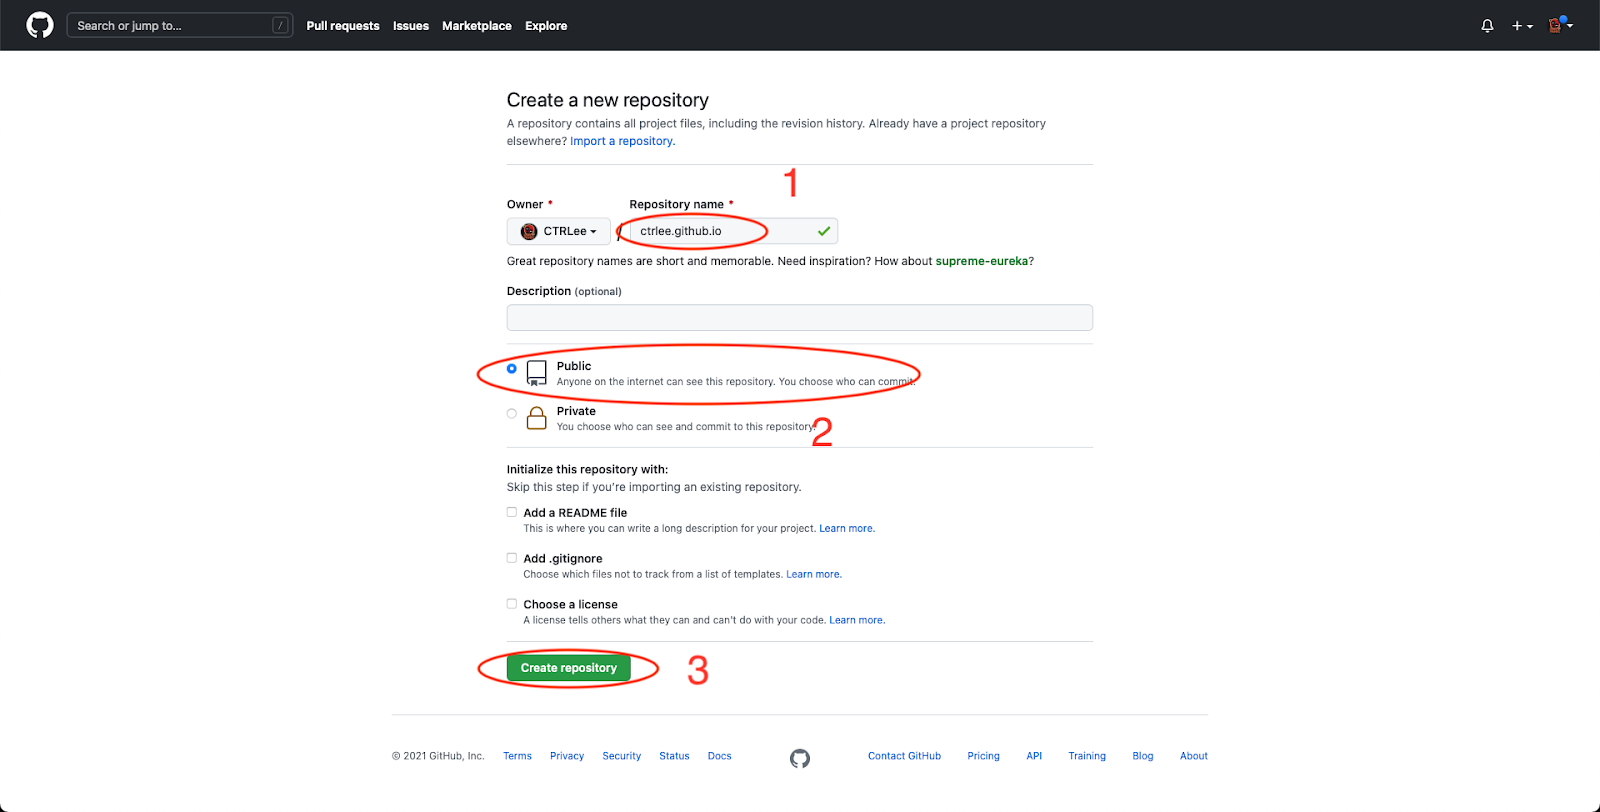
b. You will be led to a page to create a new repository. Fill in the name of the new repository (1). IMPORTANT: Your repo name must be the same as your username, as it should go something like [username].github.io. Set the permission to Public (2), and click (3) to finish the process. In my case, my GitHub username is CTRLee, so my repo name should be CTRLee.github.io.
3. Download and Install Github Desktop
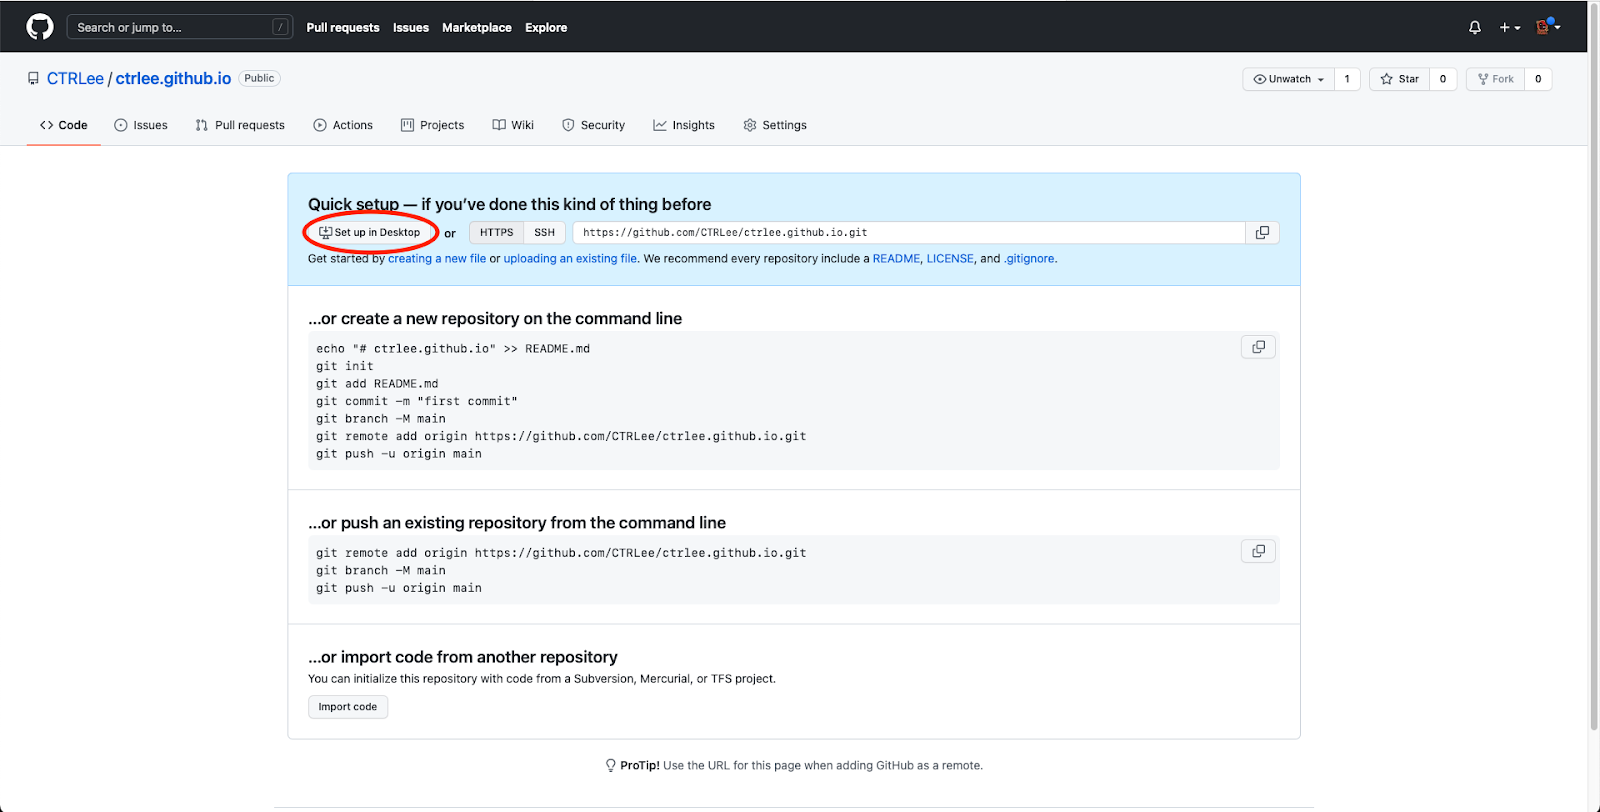
a. You can download GitHub desktop after you completed the above process. Click “Set up in Desktop”, shown in the circle.
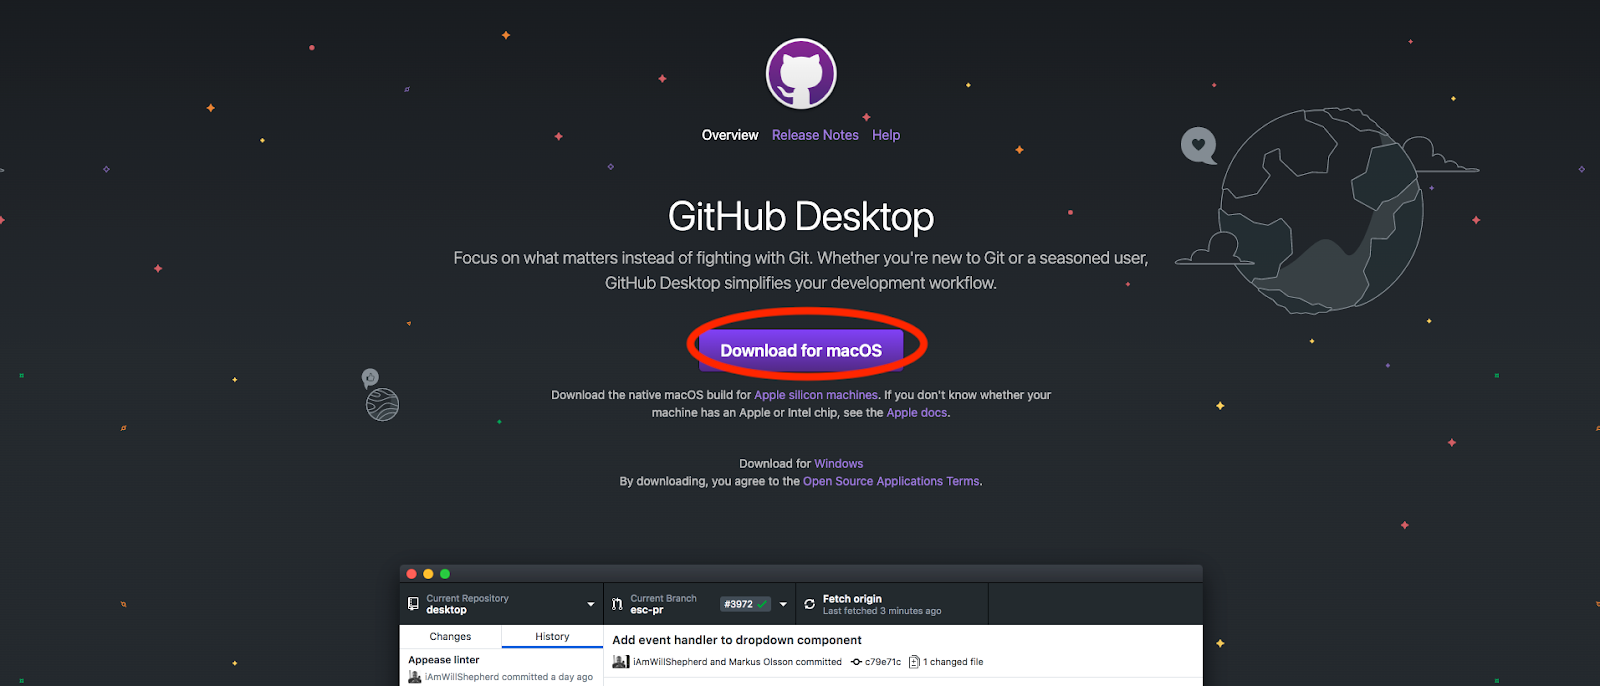
b. Click the “Download for macOS/Windows” button. The button changes depends on which Operating System you’re downloading from.
c. Login with the Browser after opening GitHub Desktop.
4. Connecting a Repo

a. Go to your Repo’s page and click “Set up in Desktop”. There will be a pop up window asking you whether you want to open GitHub Desktop, just click “Allow”.

b. Choose a repo that you want to clone. You can also define the path of your Repo yourself. When it’s done, you can click “clone”.
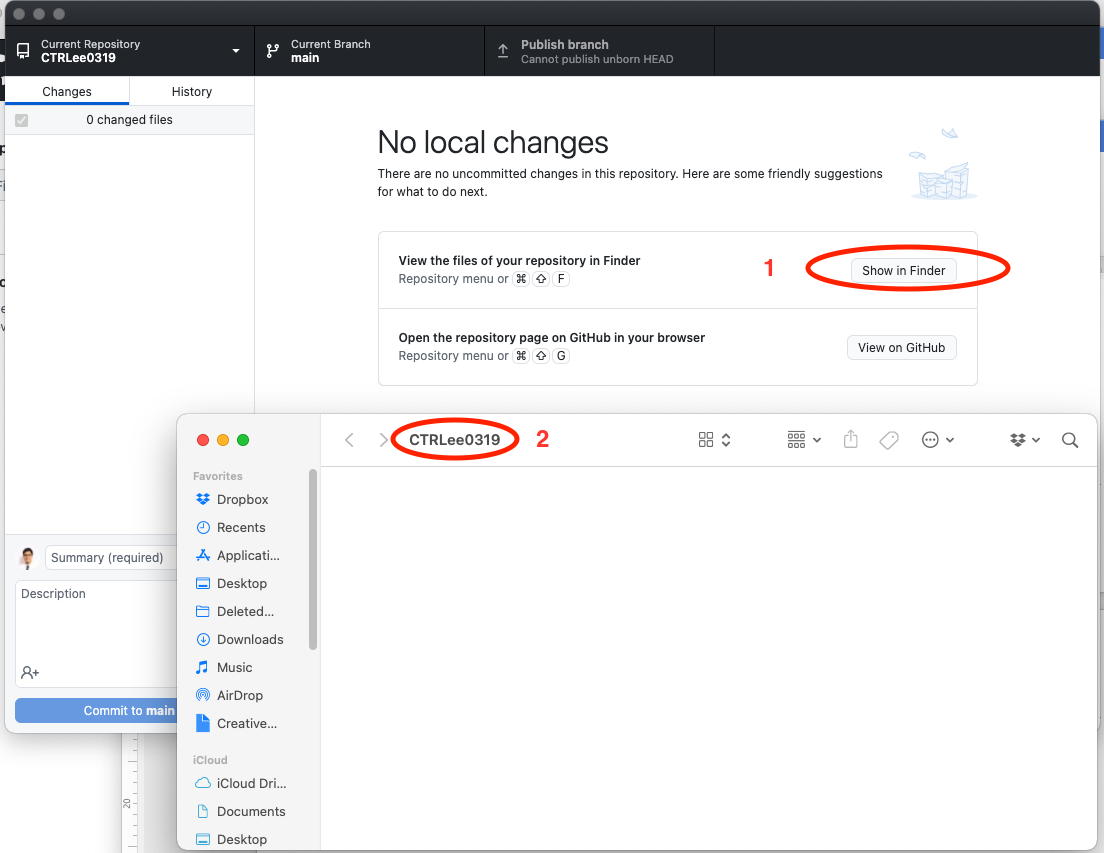
c. You have now successfully connected your repo with your computer’s folder. You can click “Show in Finder/Explorer” to open the folder.
5. Open your Webflow project and download the ZIP
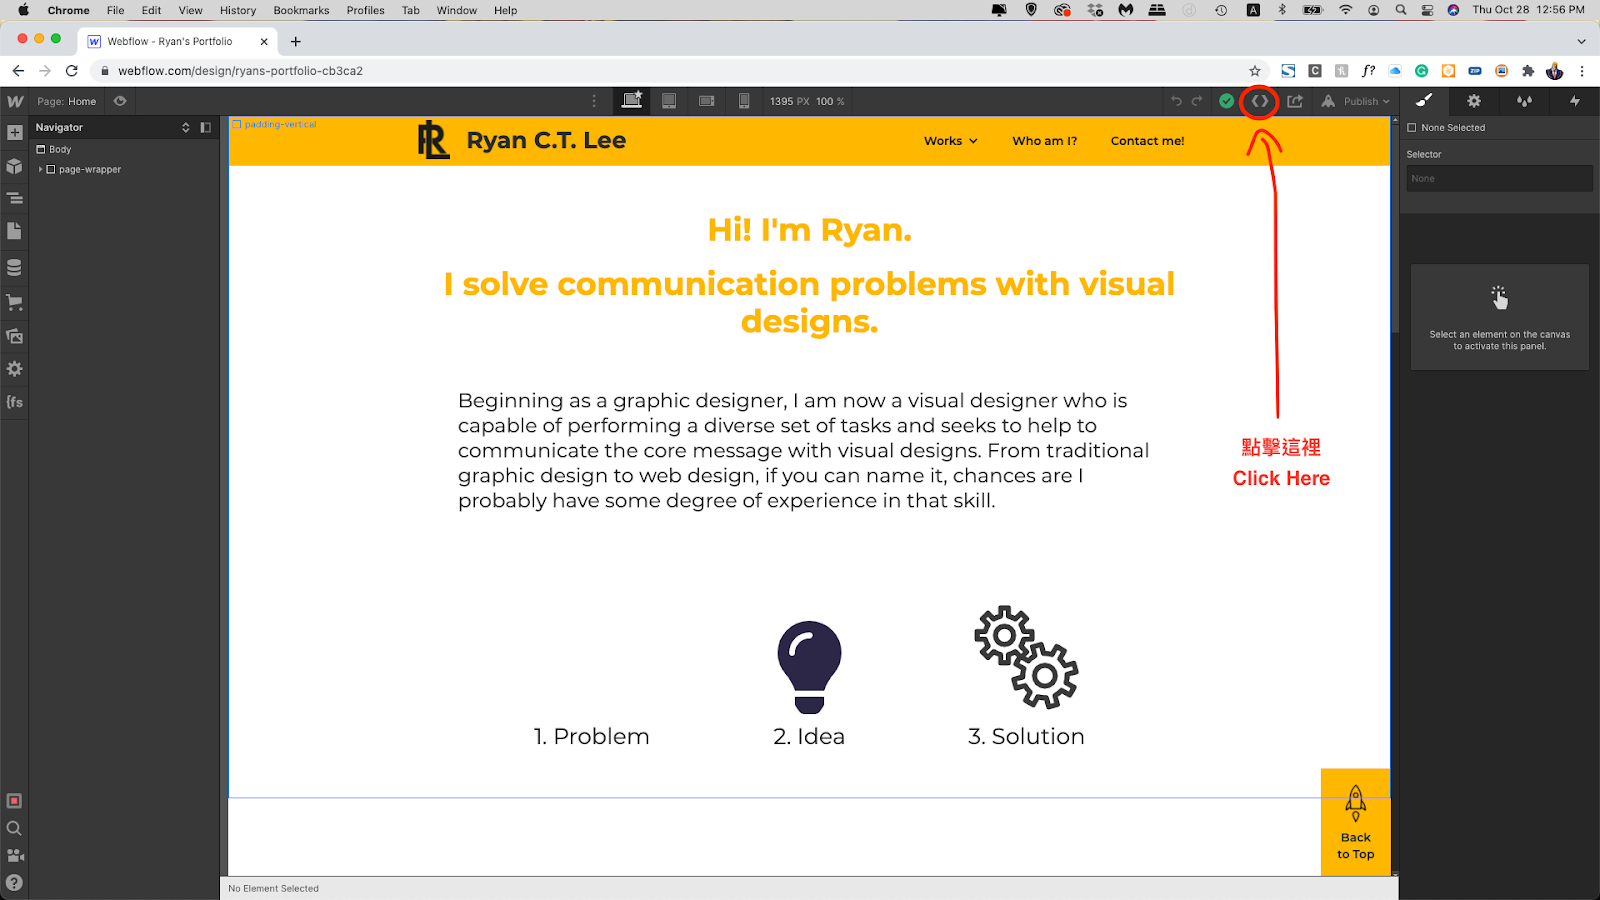
a. Open your Webflow project and click “Export Code” on the top right corner. (Red Circle)
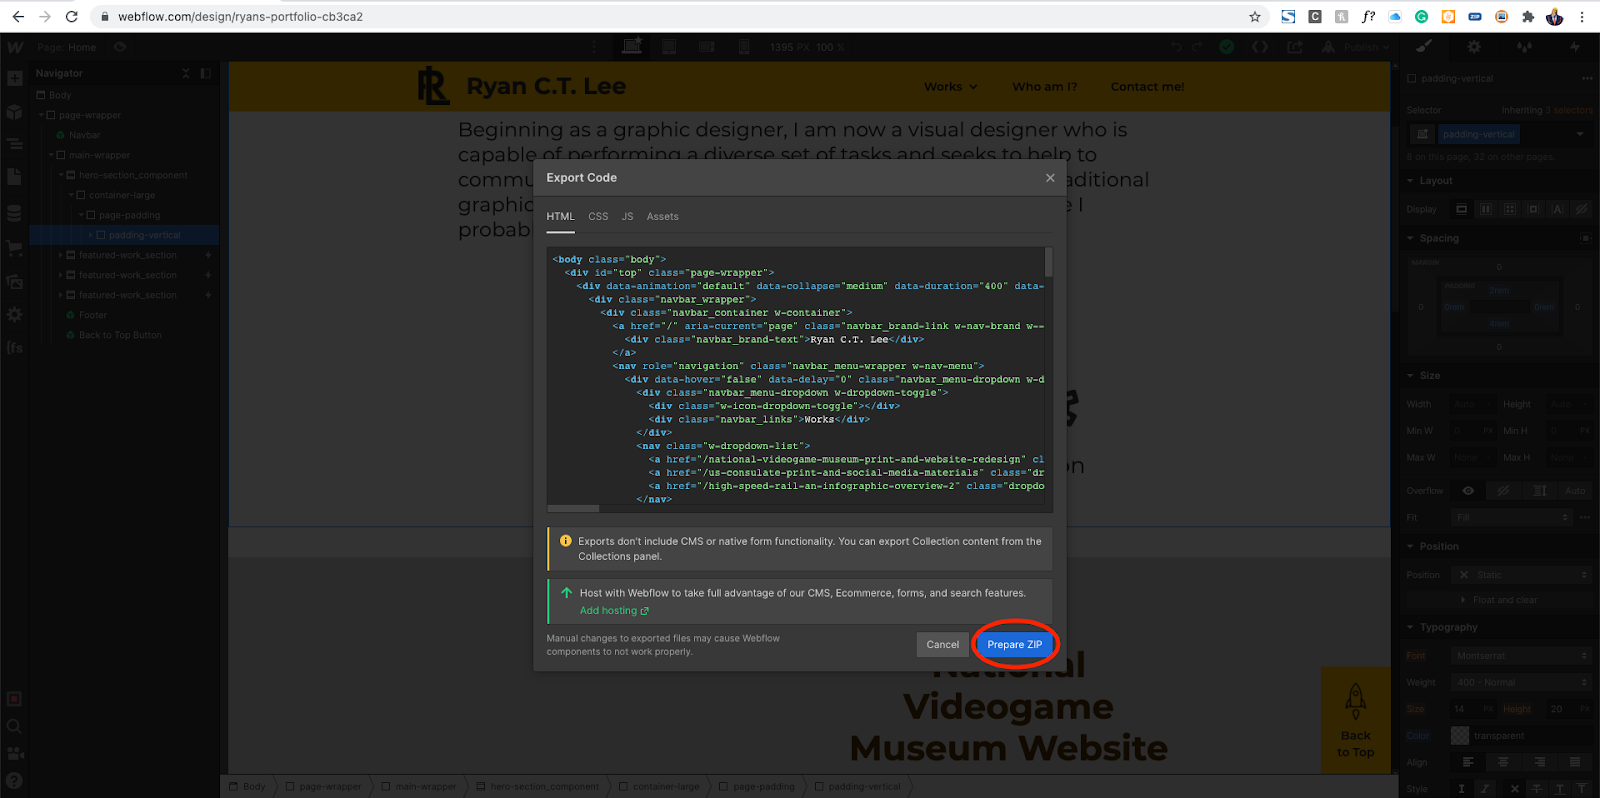
b. There will be an overlay window pop up. Click prepare zip to pack up the website when the page is finished loading, then click “Download Zip” to download the entire website.
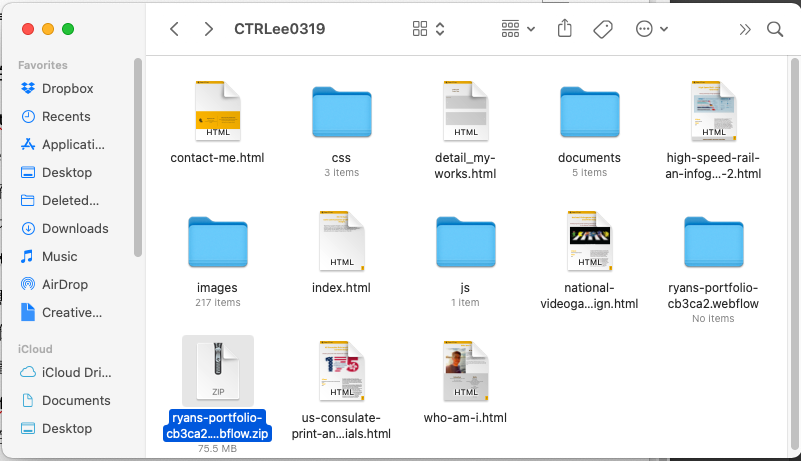
c. Move your ZIP file that you just downloaded to your GitHub repo folder and unzip it.
d. Make sure your index.html is located at your repo’s root folder. Normally, you don’t have to move any files.
IMPORTANT: Make sure the index.html is at the folder you just created/selected in step 4b/c.
6. Confirm changes on GitHub Desktop
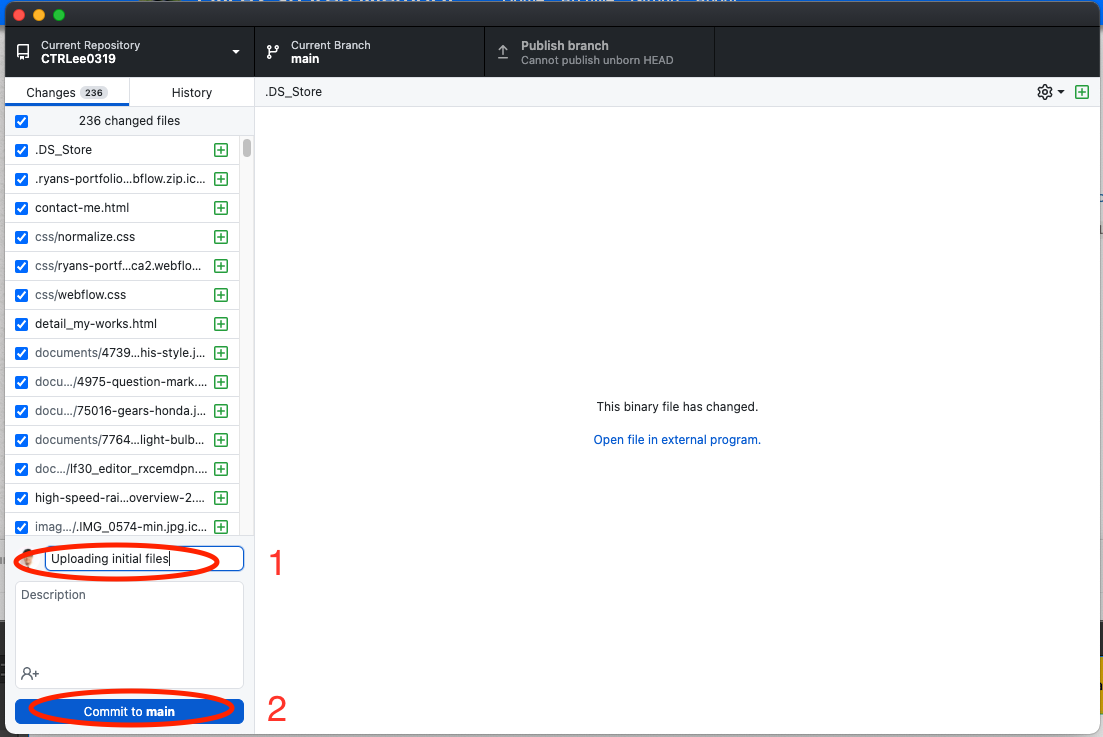
a. Open GitHub Desktop. You should see all changes in the “Changes” row on the left, including files you just added.
b. Type in the changes in the Changes (1), then click “Commit to main” (2)
c. Click “Publish Changes” in Github Desktop.
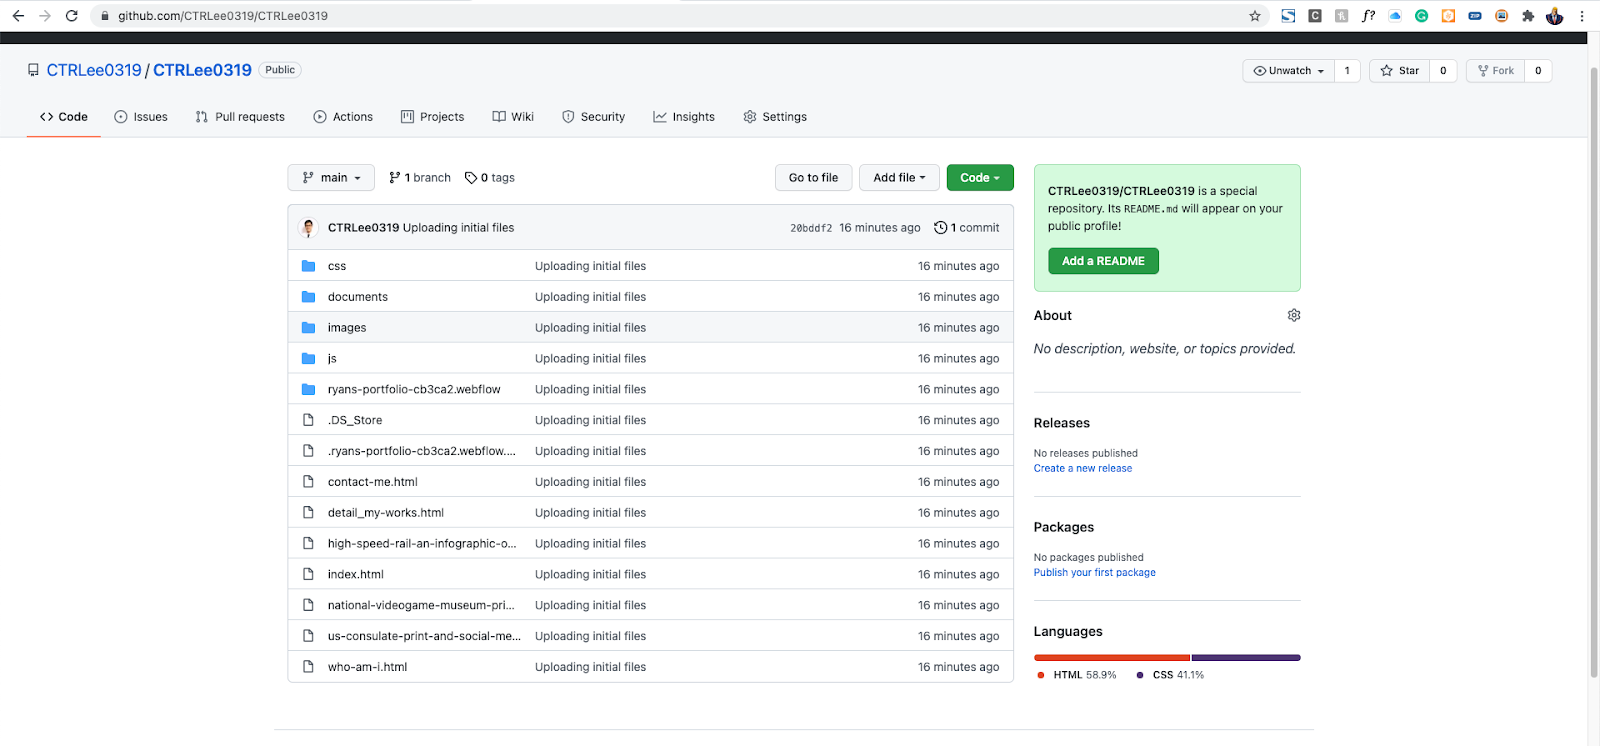
d. Refresh the repo webpage to ensure the files are uploaded correctly.
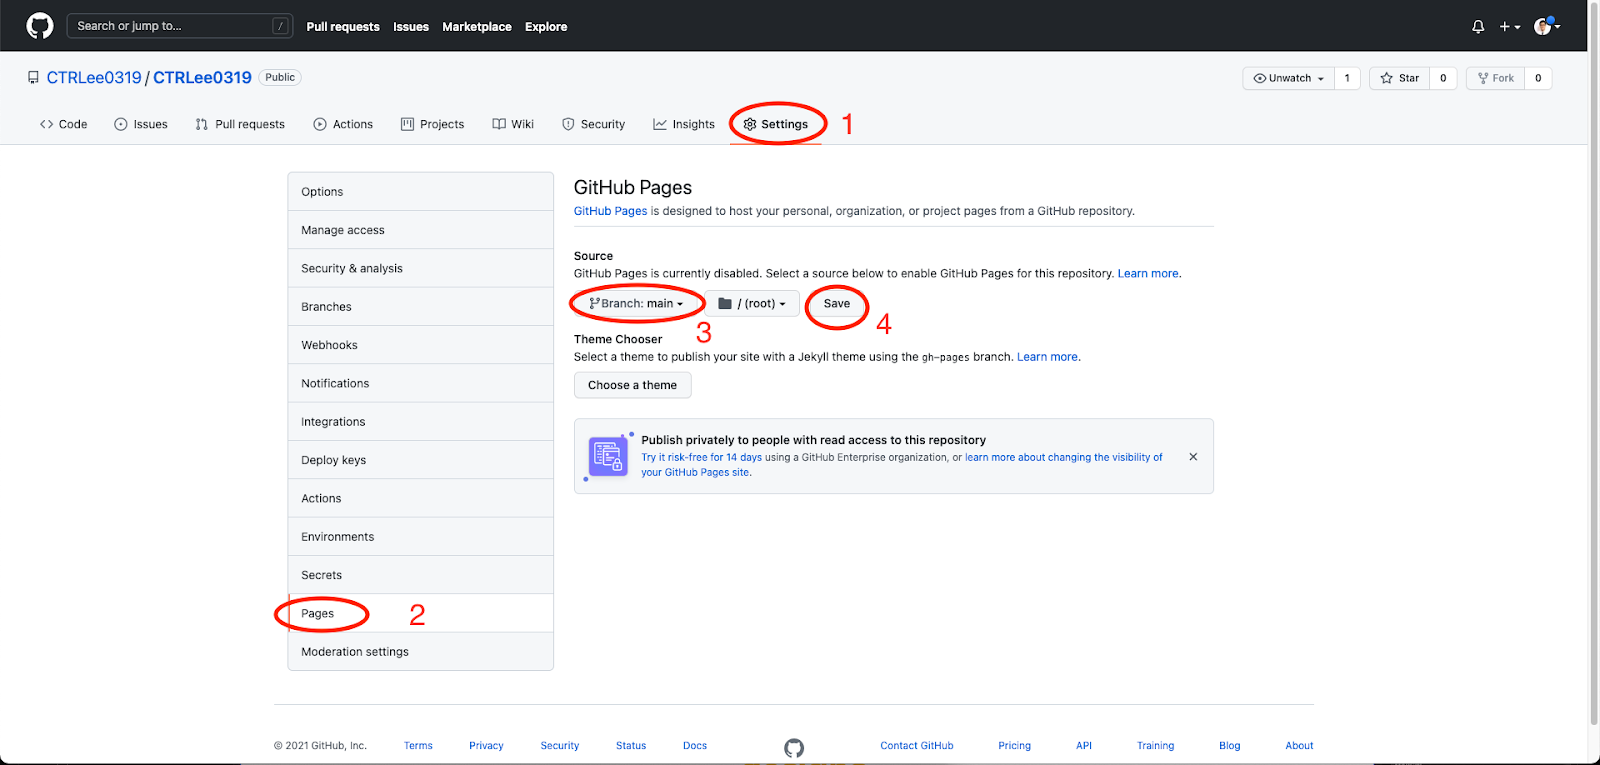
e. Click “settings” on the top row after confirming all files has been uploaded correctly.
f. Click “pages”. (2)
g. Choose “main” from the dropdown menu, then click save. Please note that your changes will take a while to become effective. If this fails, you may have entered the repo name incorrectly. Check if it's in the correct [username].github.io format.
7. Confirm changes
a. Visit [username].github.io and make sure your website displays correctly. If this fails, it's likely that the index.html file is not correctly placed in the root folder (not in any subfolders).
8. Connect your domain.
a. Select a domain for your site. If not, you can get one from sites like 101domain.
b. Go back to your repo page. Click “settings” then click “pages” in the column
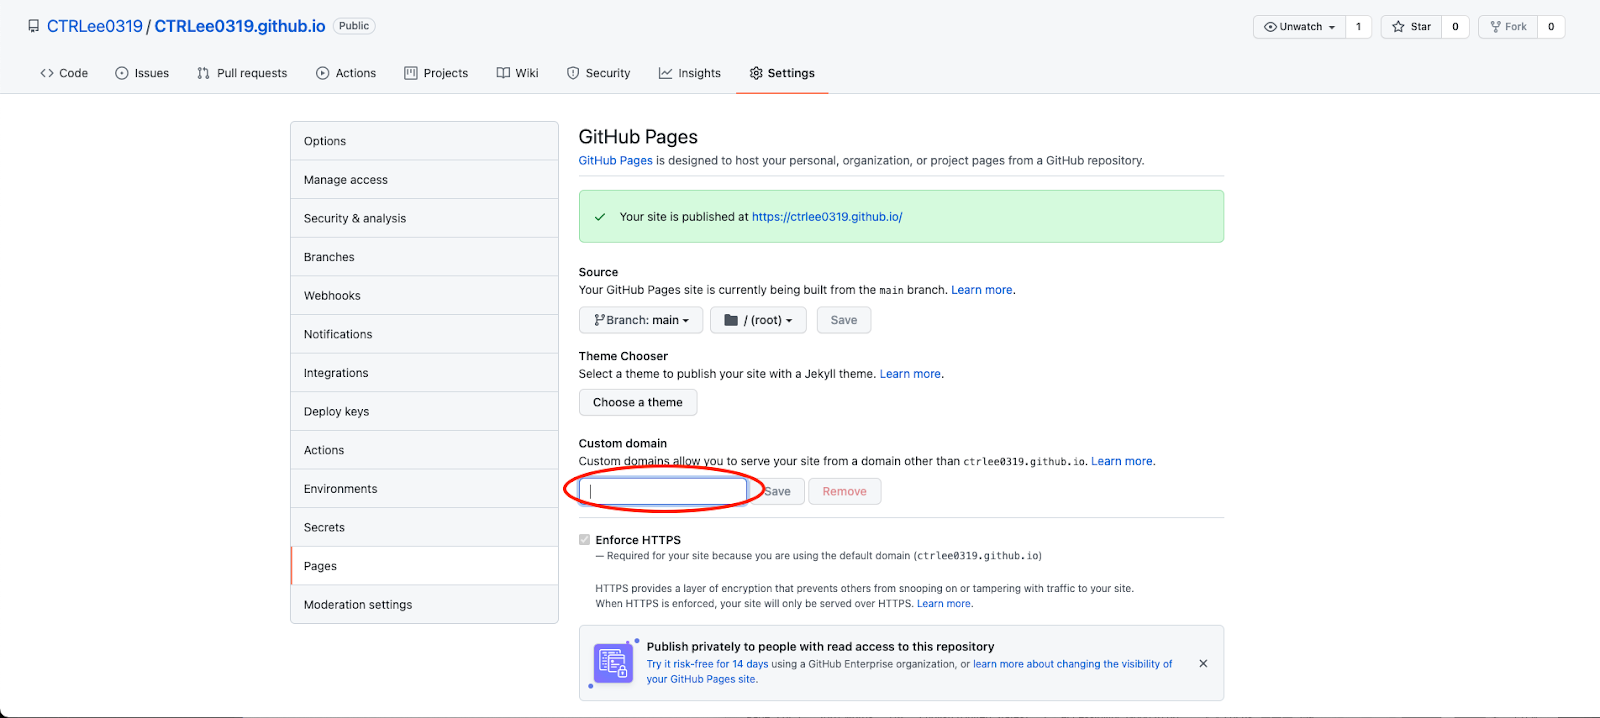
c. Type in your domain in “Custom Domain”, then click Save.
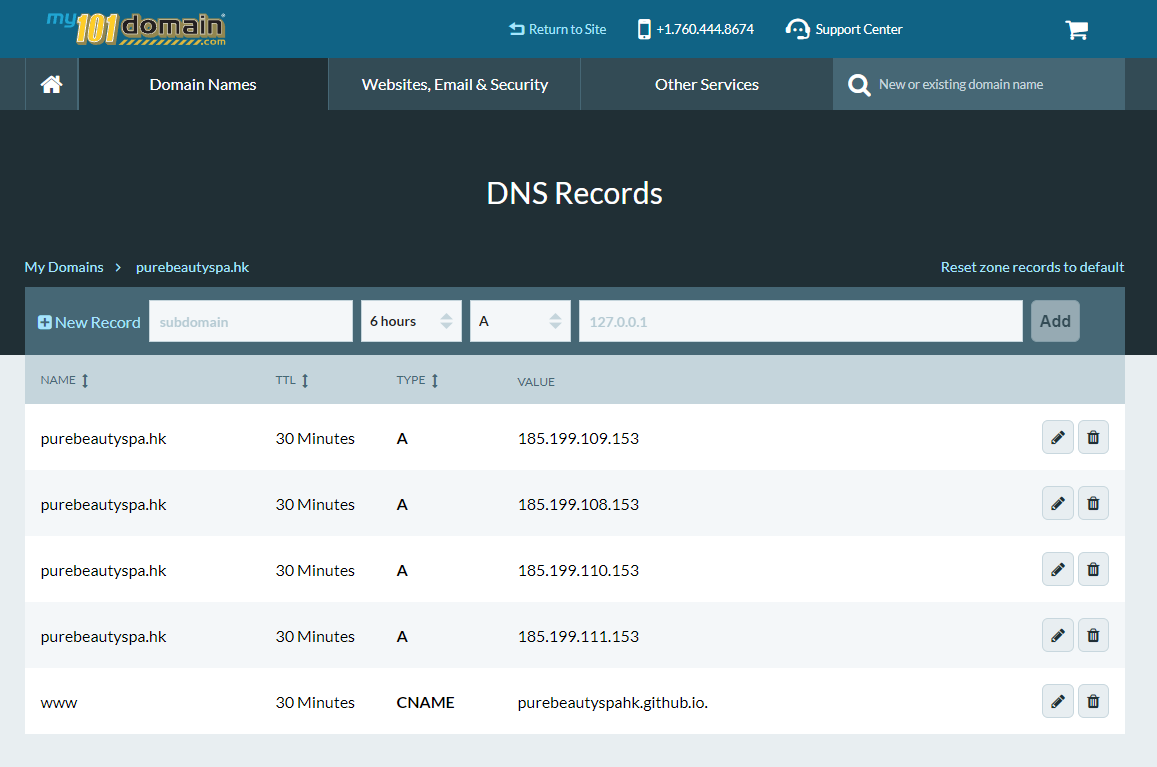
d. Go back to your domain provider's page and find the DNS settings. Type in the following data in the Domain DNS settings page. You can refer to this page for the latest IP addresses.
A records:
185.199.108.153
185.199.109.153
185.199.110.153
185.199.111.153
CNAME (www) record:
[username].github.io
Note: You may have to wait for 24 hours until the changes become effective. If you got to this far and page doesn't work, it's probably just because you need to wait longer, so please wait patiently.
Summary
Hope this helps for people with a site that they won’t change too much and have a more limited budget. This is a great method especially for lean startups and freelancers. If you are a student, Webflow offers a FREE site plan for eligible students, with the ability to remove Webflow branding (something you can’t do with Wix on a free plan) so you should do that instead.
GitHub 是透過 Git 進行版本控制的軟體原始碼代管服務平台。普遍是由應用程式開發者及科技公司使用的。不過,即使你沒有寫程式的經驗也可以使用 GitHub 去永久寄存你的簡單網站。
每一個 GitHub 帳戶或 Organization 只能夠創建一個 GitHub Pages 網站,但是因為每個賬號能夠創建無限個 Organization; 因此大家可以利用 GitHub Pages 去 host 無限個網站。
今次教學將會使用 Webflow 去製作網站原始檔,但理論上你可以用其他的形式去製作網站原始檔。
注意事項:你的Webflow帳戶起碼需要有 Account Plan Lite 才能匯出網站原始檔。另外,你的 Webflow 網頁不能夠使用CMS 及 Form Submission。
如果你從未在 Webflow 上建立網站的話,你可以跟試試跟著此 YouTube 視頻教學創立第一個 Webflow 網站。否則,你可以繼續跟著本篇教學。
步驟
1. 建立GitHub帳戶
a. 前往github.com/signup,並按照指示填寫資料,例如使用者名稱,電郵地址,密碼等資料,再進行電郵確認。
2. 建立Repository
(註:Repository中文譯法因地而異,台灣會譯作倉儲,而中國大陸就會譯作倉庫。為免産生誤會,以下將全部統稱為Repo。)
a. 當你完成上述的步驟之後,這個就是你的初始介面。點擊左上角的”Create Repository”按鈕去創建你的Repo。(紅圈示)
b. 你會被導引到創建新repo的介面。填寫Repository Name (1) 。請注意,你應該把你的repo名稱設定為和你的使用者名稱一樣,即 [username].github.io。 把權限設定為 Public (2),然後再按 Create Repository (3) 完成程序。以我做例子,我的 GitHub 用戶名稱是 CTRLee ,而我要使用的 Repository Name 必須是 CTRLee.github.io 。
3. 下載Github Desktop
a. 完成上述的步驟之後你就可以前往 desktop.github.com 下載 GitHub Desktop。或者點擊紅圈所示的 Set up in Desktop。
b. 點擊中間的Download for macOS/Windows按鈕。視乎你的操作系統而定,你的下載系統也會有所不同。
c. 開啟Github Desktop後使用瀏覽器登入。
4. 連結Repo
a. 前往Repo的頁面並再次點擊Set Up in Desktop。這時候會有一個跳出式視窗詢問你要不要開啟GitHub Desktop,點擊「容許」就可以。
b. 選擇你想要複製的Repo。你亦可以自定義Repo的路徑。確認一切無誤之後可以點擊Clone。
c. 這時候你已經成功建立將Repo與電腦内的資料夾連接。你可以點擊 “Show in Finder/Explorer”去開啟在你電腦的資料夾。
5. 開啟你的Webflow專案並把網站打包下載
a. 打開你的Webflow專案,並且點擊右上方的Export Code圖示。(紅圏示)
b. 這時網頁會彈出一個Overlay Window。等網頁載入完成後,按Prepare ZIP打包,再按Download ZIP下載整個網站。
c. 把你剛才下載的ZIP檔移到你的GitHub Repo資料夾,並將其解壓縮及刪去。
d. 確認你的index.html是位於你的Repo的根資料夾。你應該不需要移動任何檔案。
6.在GitHub Desktop上確認變更。
a. 開啟GitHub Desktop。在左邊Changes一欄裡你應該會見到所有的變更,包括剛才新增的檔案。
b. 在Summary一欄輸入你所做的變更(1),然後再點擊”Commit to Main” (2)
c. 在GitHub Desktop上再按Publish Changes。
d. 重新整理網頁以確認檔案已經正確上傳。你的頁面應該跟以下截圖相近。
7.確認所有變更。
a. 前往username.github.io確認變更生效。
8. 連結你的域名
a. 首先確認你手頭上有你的域名。如果沒有的話,你可從101domain等網站購買一個域名。
b. 在你的 Repo 頁面上點擊頁面上方的欄前往設定。(Settings)
c. 在頁面的列中點擊Pages。
d. 在 Custom Domain 一欄中輸入你的域名,然後按 Save。
e. 返回你的域名供應商網站,尋找輸入 DNS 資料的地方,在域名 DNS設 定中輸入以下資料。(請注意,以下是文章編寫時的正確設定,GitHub 有機會更改該IP數值。你可以在此連結參考當前最新的IP位址。)
A records:
185.199.108.153
185.199.109.153
185.199.110.153
185.199.111.153
CNAME record (set name to WWW):
[username].github.io
另外,你可能需要等候 24小時才令到域名變更生效,期間請耐心等候。
總結
希望這篇文章可以幫到預算有限而且又不需要經常大幅修改網頁的大家。這個方法尤其適用於初創企業或者是自由工作者。如果你是學生的話,Webflow會為合資格的學生提供免費的網站計劃。而跟WIX不同的是,Webflow能夠在你的網站移除他們的品牌,所以這應該也在你的考慮之中。
My name is Ryan Lee. I’m a Graphic Designer, and eager to solve any visual communication problems by combining the critical thinking of an engineer and the creative ideas of an artist. I am highly versatile in that I can work across different medium, from print to digital, to help you solve your problems.


.webp)